Embedded Programming
Introduction
We were to learn embedded programming for our hello boards. For the assignment, we were to program the hello board to do something, anything, and to also program with as many different programming languages as possible. The latter of which I did not do because I had no time.
Installing and changing necessary items
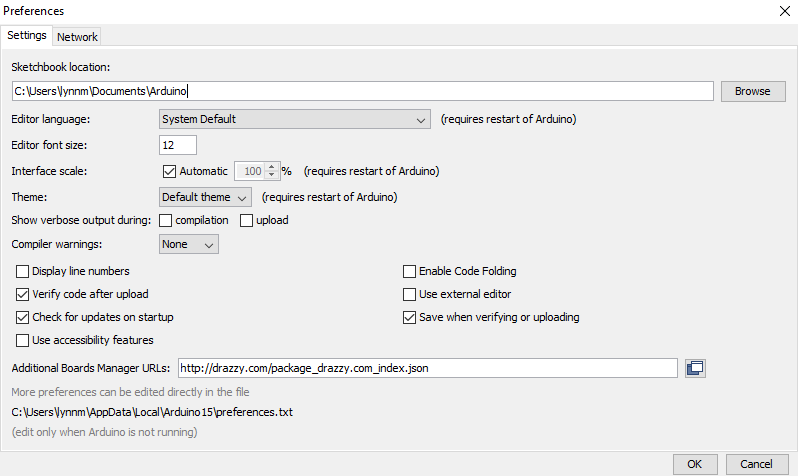
Now that I made my ISP programmer board and my Hello Board, it was time to try and program the Hello Board using the ISP. First, I needed the attiny core from Spence Konde. I just had to open up my arduino 1.8.13, go to file -> preferences, and near the bottom there is a section for "Additional Boards Manager URLs". Here I just copy pasted in "http://drazzy.com/package_drazzy.com_index.json"

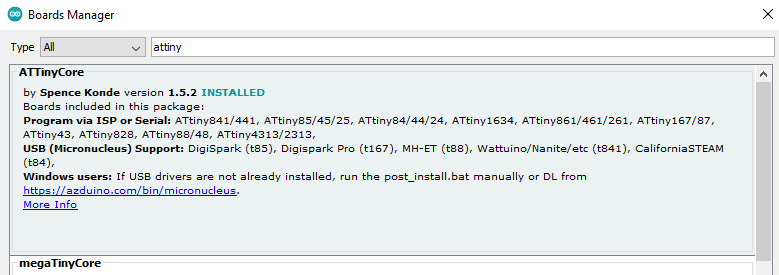
Then, I opened up Tools -> Boards -> Board Manager, waited for the boards to load, searched for the attiny core and clicked install.
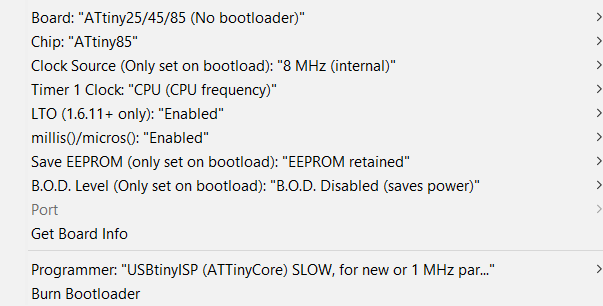
Afterwards, I had to set up the IDE to program the Hello Board. I selected the board, chip, clock source and the programmer. I then burned the bootloader and my ISP was ready to program the hello board.
Programming the board
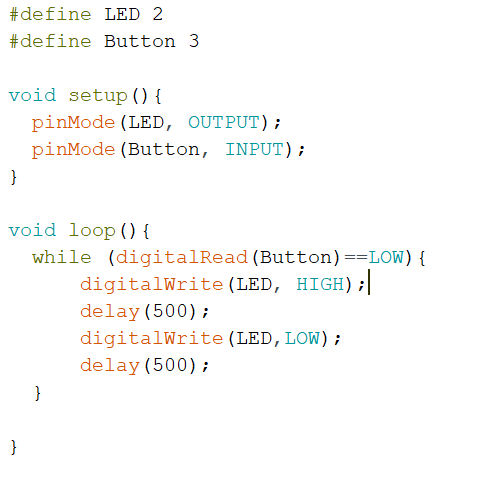
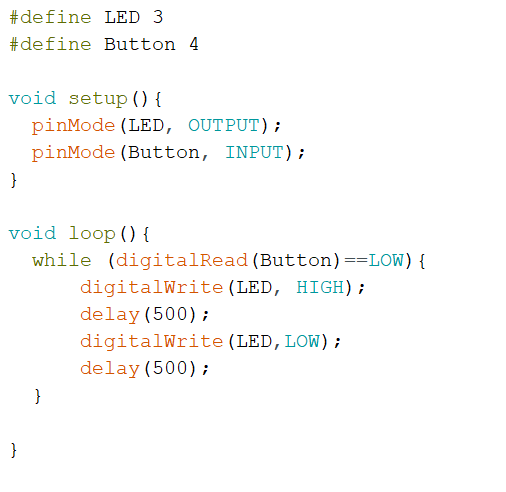
I wrote a simple program to test if my hello board was programmable. It just makes the LED blink when I press the button.
To program the board, I went to sketch then upload using programmer. CTRL + SHIFT + U is the shortcut to program.

However, when I pressed the button, nothing happened. At first I thought it was an issue with my setup, but after a while, I realised my mistake.
I went to read the datasheet for the attiny85 and there, I found out that the pin number of the chip does not equal to the pin used in arduino IDE.
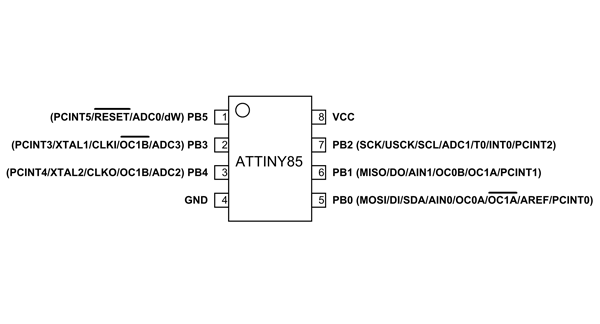
After changing the LED pin to 3 and button pin to 4, I uploaded the program again and this time it worked. I recorded a video of it working down below.
Thoughts
From this assignment, I learnt about the importance of reading datasheets of the electronic components I use. Without the datasheet, I might have missed out important information and create more problems than I should have.